Hello
guys, After a long time, I am writing an article on our blog. Today, I
am back with new cool article in which I will describe how to create Gmail account without phone number / OTP verification.
Yes!! You don’t need new mobile number every time while making new
account on Gmail. All you need is just a Android mobile or PC/Laptop for
this guide.
How to create Gmail account without phone numberAre you looking for way to make Gmail account without phone number?
Yeah!! Off course, that’s why you are here. Gmail is the best mailing
site of Google which is loved by billions of its users. It’s more better
than other sites like Yahoo mail or Hotmail. You can receive or compose
unlimited mails on Gmail. When you creates a account on Gmail, it ask
to enter your mobile number for verification. You can’t skip phone
number verification on Gmail. It will send an OTP on your number and you
must have to enter it into the box to successfully create your account
on Gmail. Also
you can’t use same mobile number for making new account on Gmail. This
is also another big problem for Gmail users. Now what to do? How to use same mobile number again and again on Gmail? Don’t worry, I will describe two ways in this guide. First one is for the users who want to create Gmail account without mobile number verification and second one is for those who want to use same phone number again and again on Gmail. There is no big requirement to follow this tutorial. You just need an Android phone to create account on Gmail without phone number. And if you want to create more than one Gmail account with same mobile number,
you need PC or Laptop for it. Now you are able to make new Gmail
account without entering phone number or any type of One time password
verification. So it isn’t a cool trick? It is the best hack ever which
helps you to create Gmail account without phone number.
Here
is the trick to create Gmail account without phone number verification.
In this method, you just need an Android phone for making Gmail account
without any type of OTP verification. Let’s read all the steps carefully
and make unlimited Gmail accounts without mobile number.
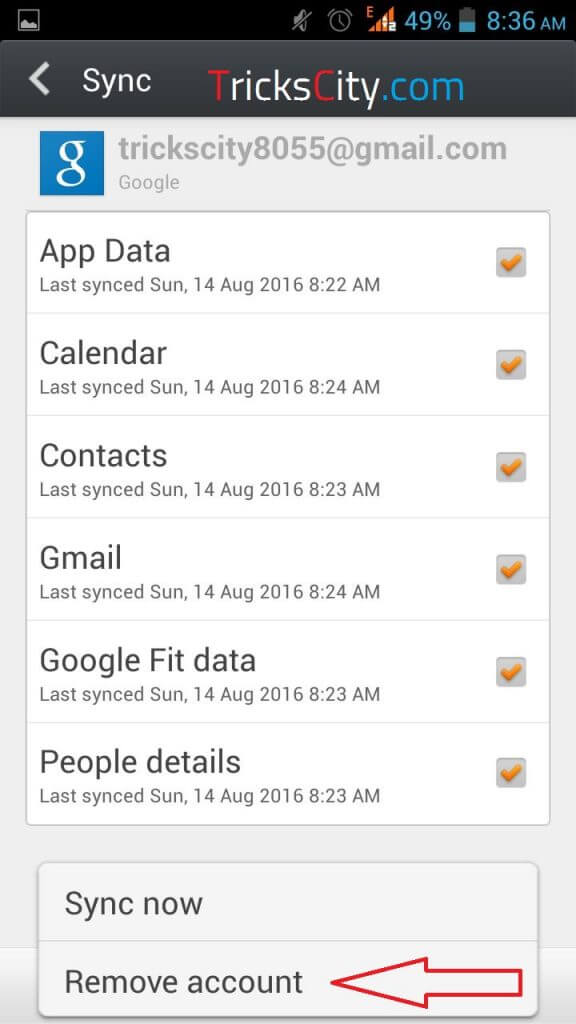
1) First of all you need to Logout all the Google accounts from your Android phone.
For removing already signed in Google accounts from your device, just go to Settings >> Accounts >> Google >> Remove.
Make Gmail account without phone verification
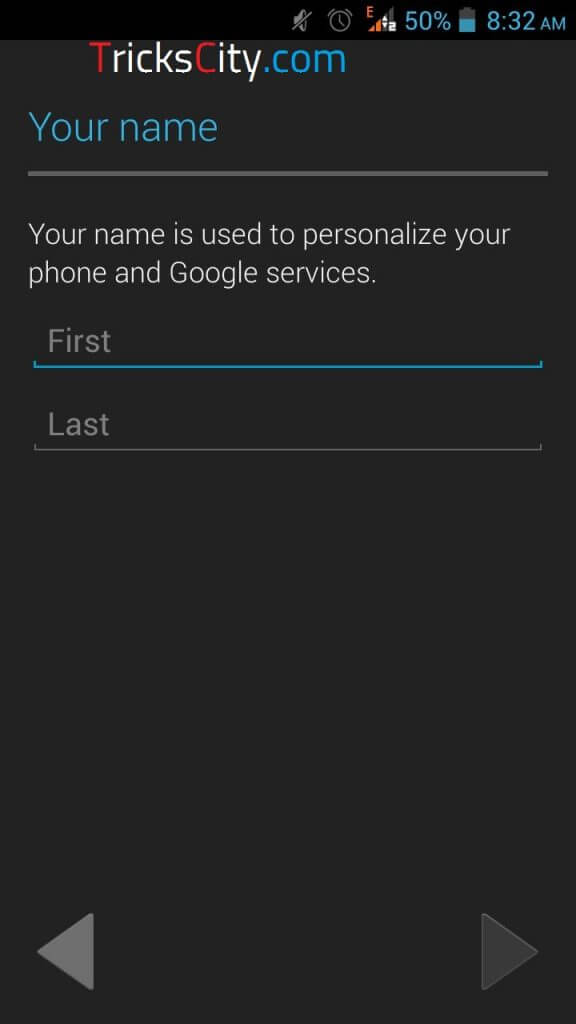
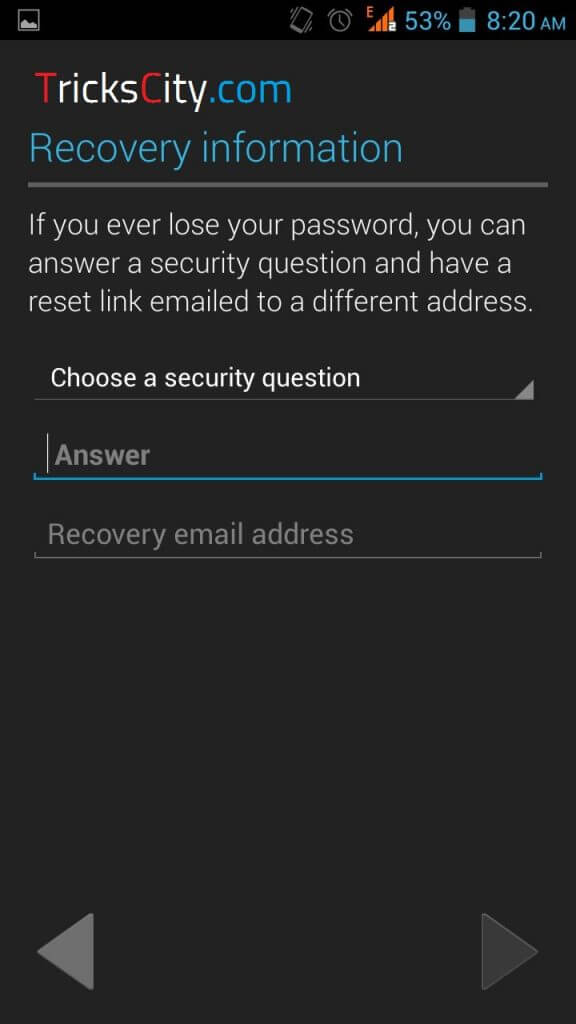
2) After removing all logged in Google accounts, again open Settings >> Accounts >> Google and this time click on New button to make new Google account. Create Google account without phone number3) Enter your First name, Last name and all the details which it asks to enter. Create Gmail account without phone number4) Select Username for new Gmail account and tap on next sign. Create gmail account without mobile number5) Now, Create password and confirm it by entering once again. Make Gmail account without using mobile number verification6) Next step is to Choose a security question.
It will ask to select any Security Question and alternate Email address
for recovery. So just enter Answer for your security question and email
address for further recovery issues.
Make Gmail account without OTP verification7) Enter verification Captcha and tap on next button. Create Gmail account without verification8)
Done, Now your new Gmail account is ready without any phone number
verification. You can use that newly created Google account for any
purpose.
Video Tutorial: How to Create Google Account Without Phone Number/OTP Verification
So this
is the method to create Gmail account without phone number verification.
You can create more unlimited Gmail accounts by repeating above
described steps again and again. Follow same procedure and make
unlimited Google accounts without mobile number verification.Must Read:-How To Bypass OTP Verification On Any Website
How To Create Many Gmail Accounts With Same Mobile Number
In
above section, I described how to create Gmail account without phone
number verification. Now, I am sharing trick to create unlimited Gmail
accounts with same mobile number. You don’t need different phone numbers
for creating more than one Gmail account. Just follow my method and use
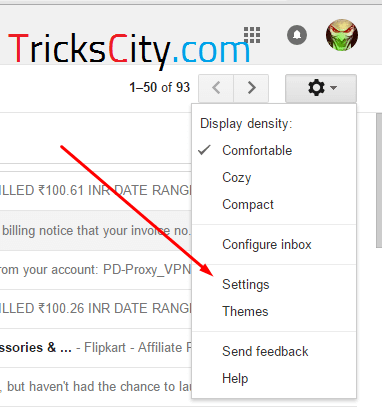
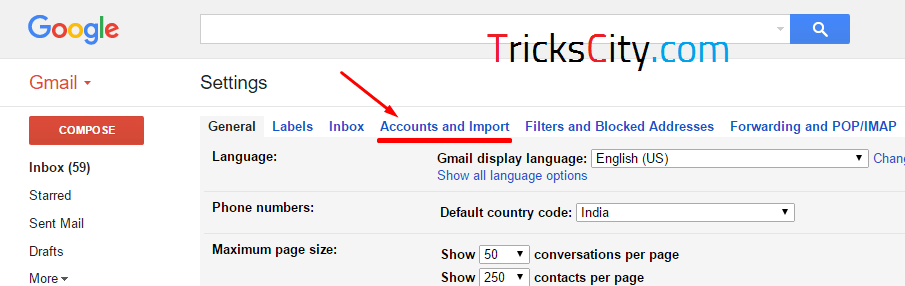
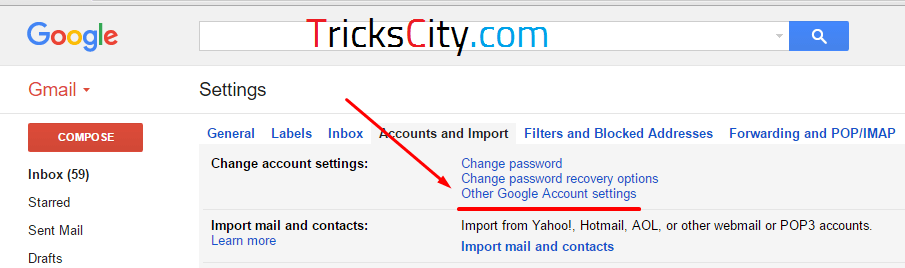
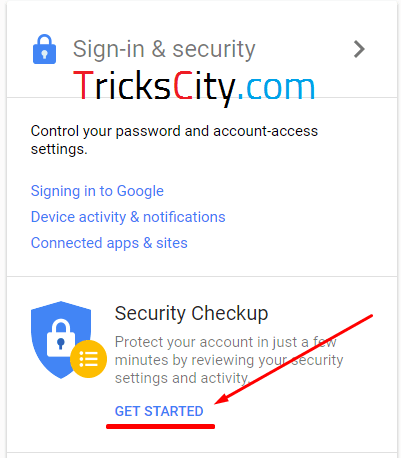
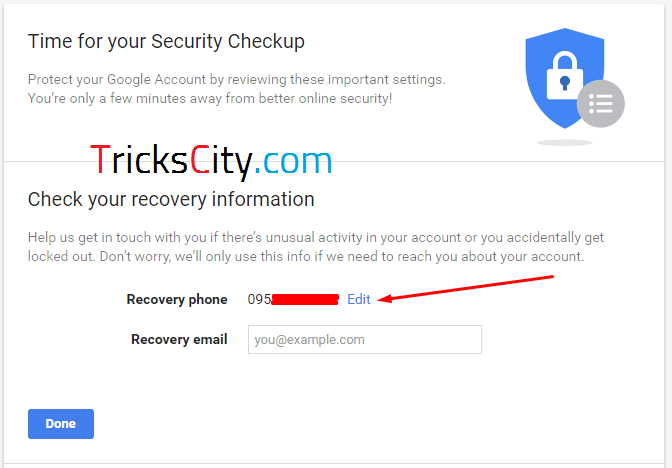
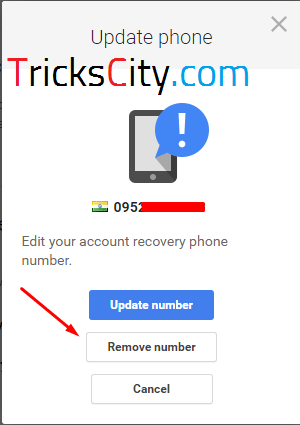
same phone number again and again for OTP verification on Gmail. 1) First of all Login to your old Gmail account in your PC browser. 2) After successfully logging in, click on Settings icon and choose Settings option from top right corner. Create Gmail Account Without Phone Number3) Now, select Accounts and Import option from settings list. Make Gmail Account Without Phone Number4) After clicking on Accounts and Import, click on Other Google Account settings option. (Screenshot given below) Create unlimited Gmail account with same number5) Scroll down and you will see option of GET STARTED in Sign-in & security tab. Make more than one Gmail account with same number6) It will ask to enter your Gmail password again, so just enter password and click on Sign in. 7) Now, it will show your Recovery phone number which you entered while creating that Gmail account. 8) Click on Edit option located in front of your phone number like screenshot given below. how to create Gmail account without mobile number9) Now, just click on Remove number
option from options to remove that number from your account. After
clicking on Remove button your number is successfully unregistered from
Google. Create account without phone number verification on GmailVoila!!
Your phone number is unregistered from Google. Now, you can use that
mobile number in creating new Gmail account without any issue related to
“This number is already registered” or anything. After creating that
new account again follow all the steps from 1 to 9 and use same phone
number for unlimited times and make Gmail accounts as much you want with
same number.
Having a reliable backup of your WordPress site is incredibly important
if you don’t want to lose all your online work. In this post, we’ll
cover some WordPress backup basics and how to backup a WordPress site in
five simple steps.
WordPress Backup Basics
Before we begin, it’s important to cover some WordPress backup basics.
WordPress doesn’t have a built-in backup system.
By default, the WordPress software running your website doesn’t have a
built-in backup system. So, it’s important to take the necessary steps
to make sure you have a WordPress backup strategy in place.
Quite simply: If you don’t have a recent backup and your site is
hacked or your server crashes, you could be facing a complete and total
loss of your WordPress website.
You basically have three options when it comes to WordPress backups:
Rely on your web host (or service provided by your web host) to backup your WordPress site
Perform a manual backup by downloading all WordPress files from your
server – see instructions here from the WordPress codex for backing up your WordPress site.
In the chart below, we outline some of the most important features of
a WordPress backup solution and how each option shapes up.
WordPress Backup Plugin (BackupBuddy)
Backup Service through Web Host
Manual Backup
Automatic, Scheduled Backups
(check with host to confirm frequency)
✘ (manual process)
Backup All Files + Database
(check with host to confirm Media Files + all files in site directory are included)
Fast & Easy Restores
(check with host to confirm)
✘
Database Rollbacks
(check with host to confirm)
✘
Migration (Move to New Host or Domain)
✘ (usually requires support tech)
✘ (requires additional steps)
Downloadable Backup Zip Files
(check with host to confirm)
✘ (files won’t be zipped by default)
Off-site Storage of Backup Files
(includes multiple options)
(check with host to confirm storage location)
✘ (you’ll have to set this up on your own)
Performance Relies on Quality of Host
(Some shared hosting plans limit server resources, loopbacks, etc.)
Why Use a WordPress Backup Plugin Like BackupBuddy?
Since host backup quality varies widely and manual backups are far
too time-consuming, we recommend using a WordPress backup plugin to
backup your WordPress site. Using a backup plugin will save you time,
ensure you own your backup files and site data, and allow you to easily
restore (or move) your WordPress site.
Our recommendation: Use BackupBuddy to save time and automate backups.
As explained in the chart above, running a backup plugin to handle
backups for you has several advantages. One important component of a
successful backup strategy is the ability to set up scheduled, automatic WordPress backups.
Not sure if BackupBuddy is right for you? Check out this guide for finding the best WordPress backup plugin.
BackupBuddy includes a ton of backup scheduling options that most
backup services provided by your host don’t actually offer, including
yearly, twice yearly, every three months, once monthly, twice monthly,
once weekly, twice weekly, every other day, once daily, twice daily and
once hourly. If you are using a backup solution through your host,
confirm their backup scheduling options can run to match how frequently
your site is updated.
Another advantage of using a plugin is that you actually own your
backup files and data. With a plugin like BackupBuddy, you can download
your backup zip files to your computer or store them in a secure,
off-site storage destination of your choosing. You don’t have to request
a zip file from a service, wait on file delivery, or get stuck with an
incomplete backup.
BackupBuddy also handles restoring your WordPress site if something goes wrong. A WordPress backup and restore feature is the second component of a complete WordPress backup solution. What good is a backup if you can’t do anything with it?
Last, BackupBuddy also allows you to move your WordPress site to a
new host or domain. Owning your website files means not being locked
into a poor web host. BackupBuddy’s WordPress migration feature makes it possible to easily change hosts, servers or your WordPress site’s domain name.
How to Backup a WordPress Site: 5 Simple Steps
1. Follow the normal WordPress plugin installation methods to
install and activate the BackupBuddy plugin on your WordPress site.
Complete the Quick Setup Wizard to fill out some necessary backup settings.
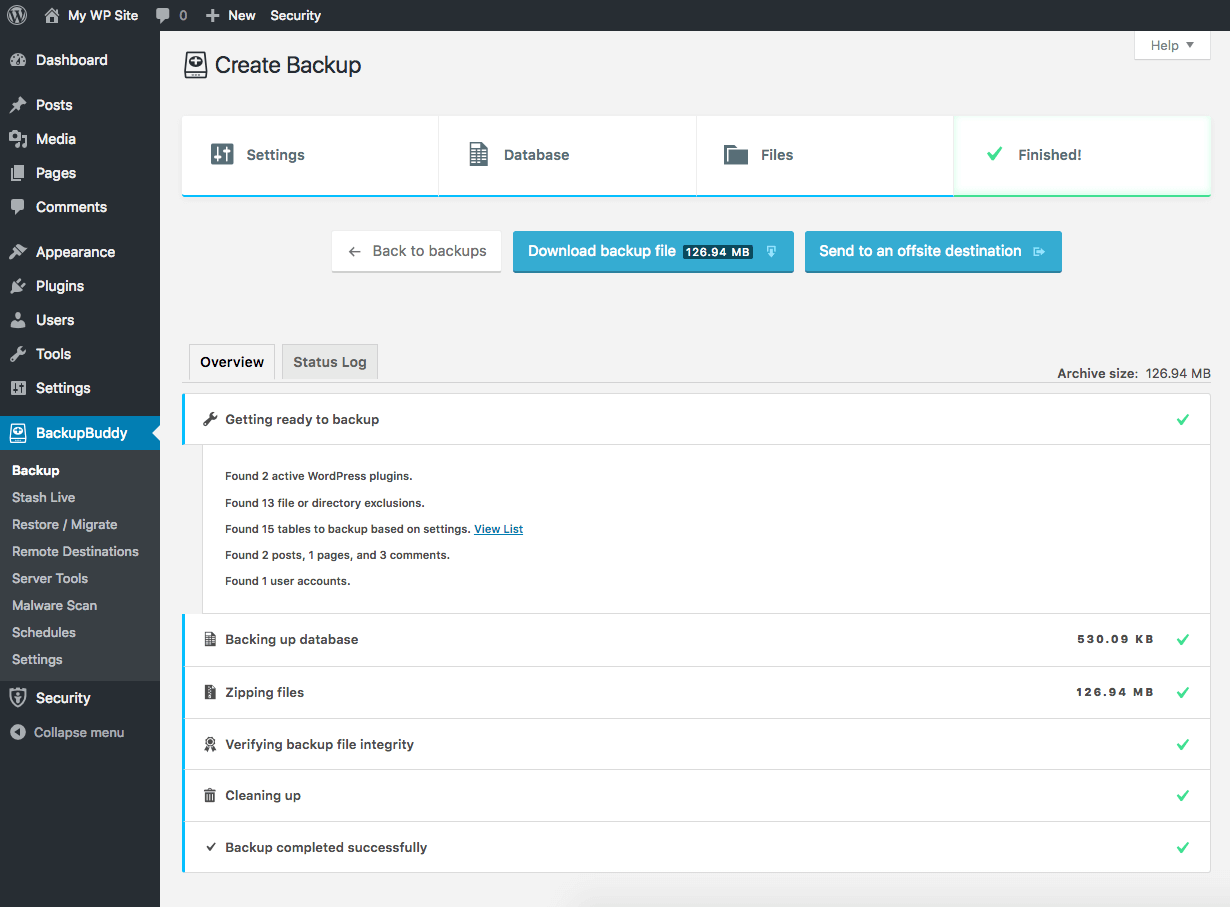
2. Run a complete backup of your WordPress site. Download the zip file of your WordPress site backup.
Navigate to the BackupBuddy > Backups page and click the (Full)
Complete Backup button. BackupBuddy will go to work backing up your
WordPress site’s database and files, zipping up the files and verifying
the backup integrity.
You can download your backup zip file immediately here by clicking the “Download backup file” button.
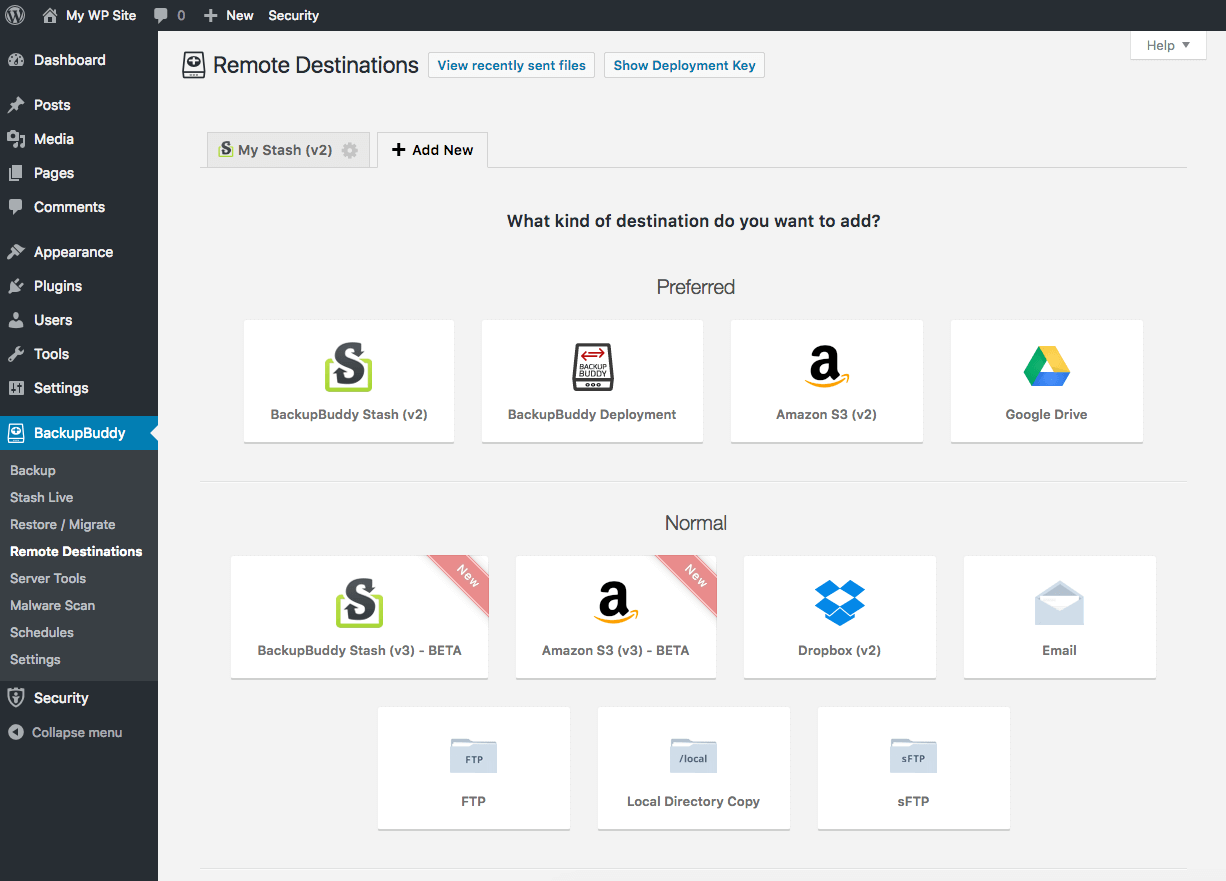
3. Set up Remote Destinations to store your WordPress Backups.
Your backup files should be stored safely off-site in a secure,
remote storage location. From the BackupBuddy > Remote Destinations
page, you con configure your Remote Destinations settings here.
BackupBuddy supports several remote destinations, including WordPress backup to Dropbox and WordPress backup to Google Drive.
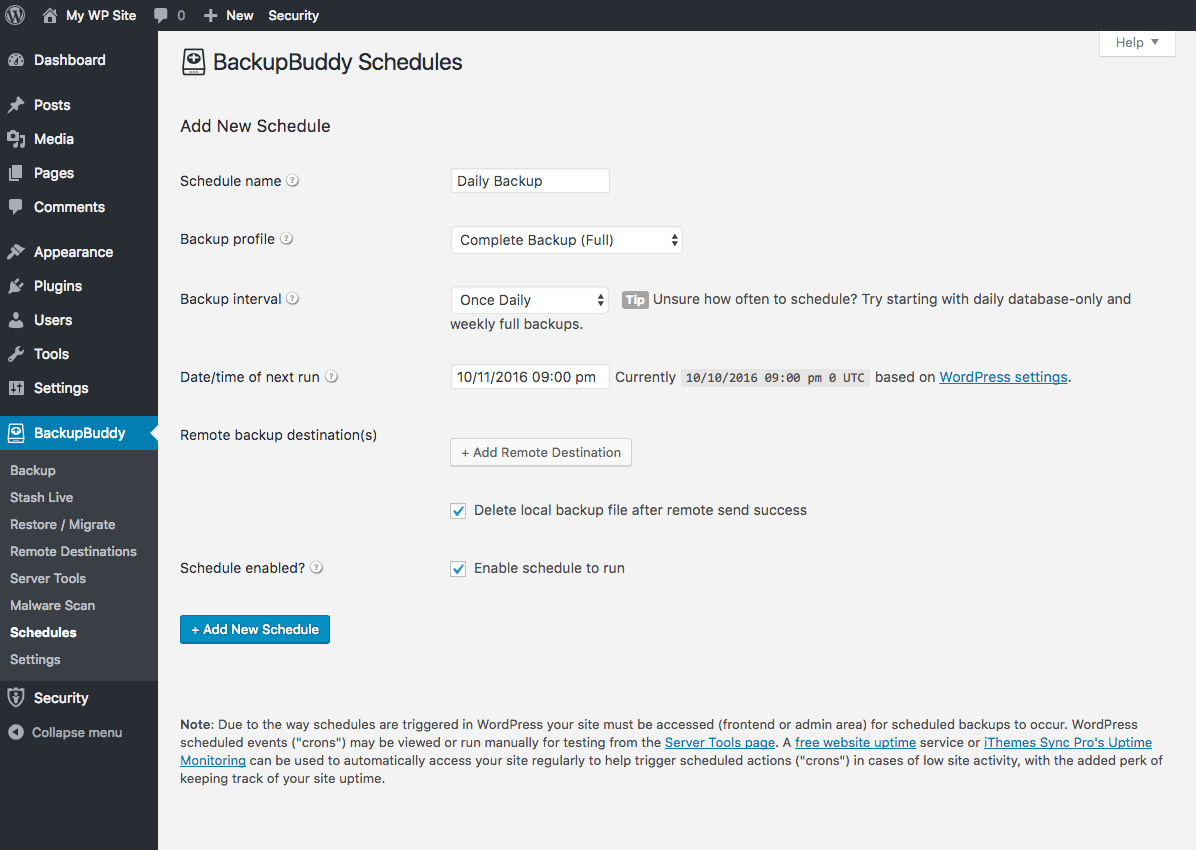
4. Set up Backup Schedules so backups run automatically.
The next important step is to make sure WordPress backup schedules
are set up and running. Setting up these schedules means you don’t have
to manually run backups; BackupBuddy will just handle your WordPress
backups automatically for you.
Visit the BackupBuddy > Schedules page to configure your settings.
From here, you can select backup intervals and where to deliver backups
once they complete.
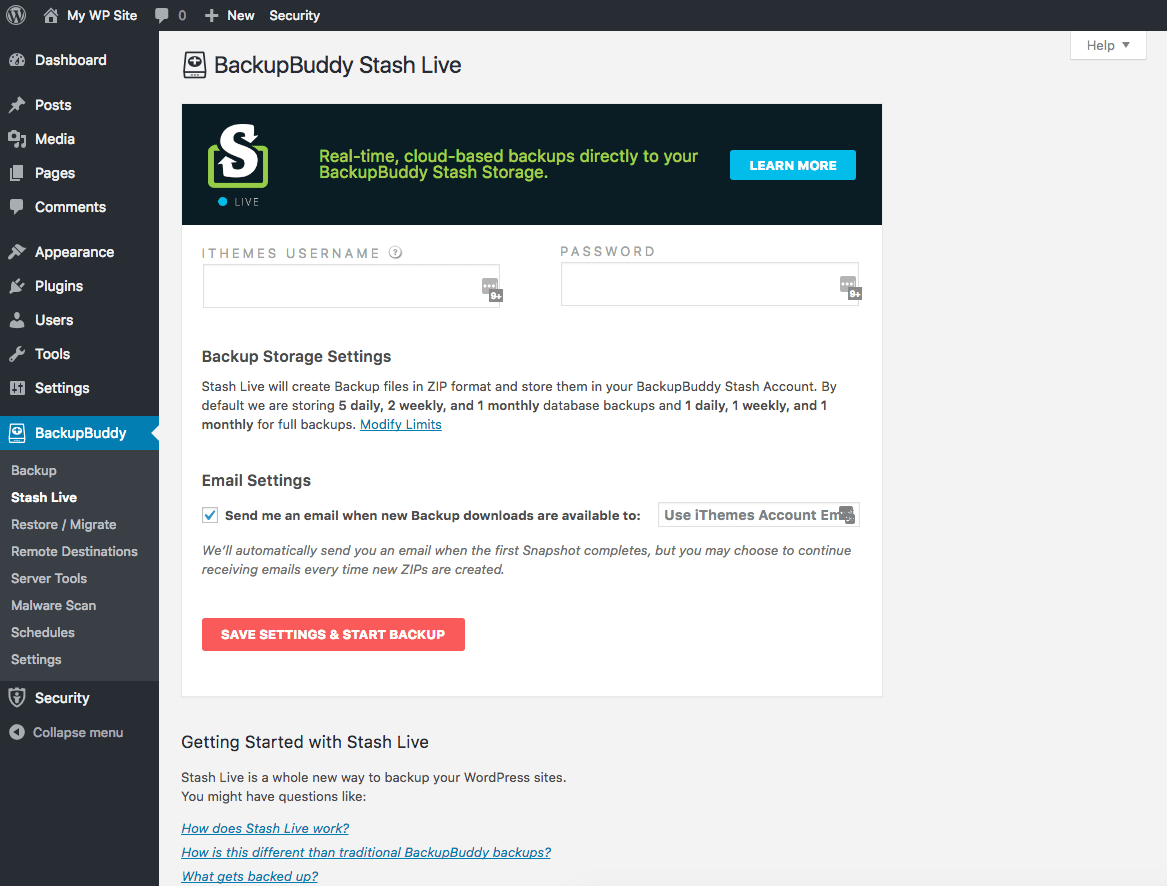
5. Enable Stash Live for real-time, cloud-based backups.
BackupBuddy 7.0 introduced a new cloud-based, real-time WordPress backup
system. All BackupBuddy users get 1GB of free backup storage space, so
enable Stash Live to take advantage of this redundant backup. One of the
key features of Stash Live is how it makes realtime backups of changes
as they happen. Stash Live also works well even if your host has limited
your server resources.
From the BackupBuddy menu, visit the Stash Live page. Enter your
iThemes username and password and Stash Live will go to work building a
complete snapshot of your WordPress site.